
Did you know that the key to unlocking the full potential of your vinyl collection lies in keeping your record needle clean?
In this article, we’ll explore why regular cleaning of your record needle is essential for optimal sound performance and the durability of both your vinyl and your equipment.
Now that you understand the importance of a clean record needle, let’s discuss how to properly clean it:
My name is Paul, an accountant turned audio enthusiast and audiophile. I have been reviewing audio products for some 15 years and can help you solve your audio-related matters.
Let’s dive right in and let me help you understand How to clean your record needle
Step-by-Step Guide: Cleaning Your Record Player’s Needle for Beginners
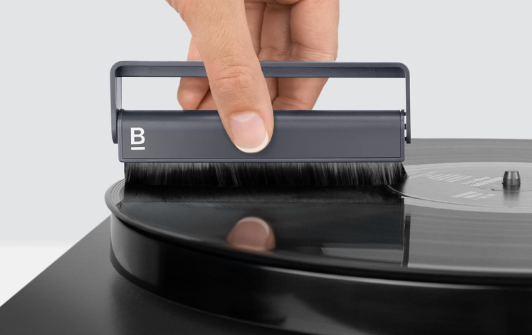
Method 1: The Magic of a Microfiber Brush
One of the simplest and most effective ways to clean your record needle is by using a microfiber brush. This method is gentle and safe for your needle, while effectively removing dirt and debris. Here’s how to do it:
1. Start by turning off your turntable and removing the record from the platter.
2. Gently hold the tonearm and carefully lower the needle onto the brush’s bristles.
3. Move the brush back and forth in a gentle sweeping motion, allowing the bristles to clean the needle’s surface.
4. Repeat this motion a few times to ensure thorough cleaning.
5. Once you’re satisfied, lift the tonearm back to its resting position and turn off the turntable.
Advantages:
– Safe and gentle cleaning method that minimizes the risk of damaging the needle.
– Quick and easy process that can be done regularly to maintain optimal audio quality.
– Affordable and readily available tool.
Pro Tip: Consider using a stylus cleaner solution or a drop of isopropyl alcohol on the microfiber brush for more effective cleaning. Just make sure to handle the alcohol with care and avoid excessive use.
Click on the following links to clean your record player using a microfibre brush.
Best Microfiber Brush to clea your record player
Best Stylus cleaner solution to clean your record player
Best Isopropyl alcohol to clean your record player
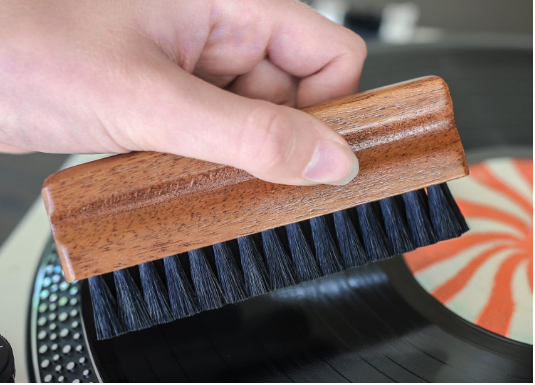
Method 2: The Power of a Carbon Fiber Brush
If you’re dealing with more stubborn dirt or debris on your record needle, a carbon fiber brush can be a game-changer.
The carbon fibers create a static charge that attracts and removes particles from the needle’s surface. Here’s how to use a carbon fiber brush:
1. Turn off your turntable and remove the record from the platter.
2. Hold the tonearm and gently lower the needle onto the carbon fiber brush.
3. Move the brush back and forth in a sweeping motion, allowing the carbon fibers to remove the dirt and debris.
4. Repeat this motion a few times to ensure thorough cleaning.
5. Lift the tonearm back to its resting position and turn off the turnt able.
Advantages:
– Effectively removes stubborn dirt and debris from the record needle.
– Safe and gentle cleaning method that minimizes the risk of damaging the needle.
– Can be used regularly to maintain optimal audio quality.
Disadvantages:
– More expensive than a microfiber brush, but still an affordable option.
– Requires a steady hand to ensure precise movement of the brush.
Pro Tip: Consider using a stylus cleaner solution or a drop of isopropyl alcohol on the carbon fiber brush for enhanced cleaning performance.
Click on the link below to find
The best carbon Fiber brush to cean your record player
Method 3: The Precision of a Stylus Cleaner Kit

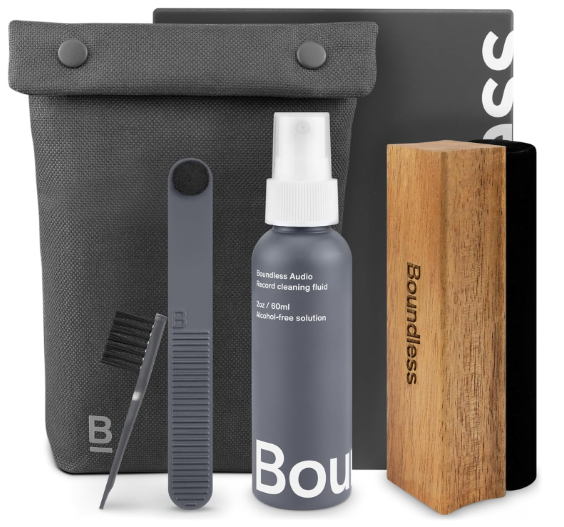
For a more thorough and precise cleaning of your record needle, a stylus cleaner kit can be a valuable investment. These kits often include a cleaning solution, a brush, and a stylus cleaning pad. Here’s how to use a stylus cleaner kit:
1. Turn off your turntable and remove the record from the platter.
2. Apply a small amount of the cleaning solution to the stylus cleaning pad.
3. Gently lower the needle onto the pad and lift it back up.
4. Repeat this motion a few times to ensure thorough cleaning.
5. Carefully brush the stylus with the included brush to remove any remaining residue.
6. Lift the tonearm back to its resting position and turn off the turntable.
Advantages:
– Provides a thorough and precise cleaning of the record needle.
– Removes stubborn dirt and debris effectively.
– The cleaning solution is specifically designed for safe and gentle use on stylus tips.
Disadvantages:
– Requires a stylus cleaner kit, which can be more expensive than other cleaning methods.
– Requires careful handling to avoid damaging the needle.
Pro Tip: Follow the manufacturer’s instructions on the stylus cleaner kit for the best results and long-lasting performance.
Click on the link below to find the
Best Stylis Cleaner Kit to clean your record player
Maintaining Your Record Needle for Longevity and Quality
Cleaning your record needle is just one part of maintaining your turntable for optimal audio quality and longevity. Here are some additional tips to keep in mind:
1. Avoid touching the needle with your fingers to prevent oil and dirt transfer.
2. Keep your records clean and free from dust and debris to minimize the buildup on the needle.
3. Store your records properly in protective sleeves to prevent scratches and contamination.
General Record Needle Cleaning Guidelines
While there isn’t a one-size-fits-all approach to cleaning your record needle, here are some general guidelines to help you determine how often to clean it:
1. Light Use: If you listen to your records occasionally, cleaning the needle every 20-30 hours of playtime should suffice. This will help maintain optimal audio performance without excessive wear on the needle.
2. Regular Use: For those who enjoy their vinyls regularly, cleaning the needle every 10-20 hours of playtime is recommended.
This frequency ensures that any dust or debris that may have accumulated is removed promptly.
3. Heavy Use: Audiophiles and DJs who frequently use their turntables should clean the needle every 5-10 hours of playtime.
This level of maintenance will help preserve the pristine sound quality and extend the lifespan of the needle.
Expert Tips for Record Needle Care:
To further enhance your turntable maintenance routine, consider the following tips:
1. Handle Vinyls with Care: Always handle your records by their edges to avoid transferring oils and dirt onto the playing surface. Additionally, store your vinyls in protective sleeves to minimize the risk of scratches.
2. Clean Vinyls Before Playing: Before placing a record on the turntable, make sure to clean it using a carbon fiber brush or a record cleaning machine. This will minimize the transfer of dirt and dust onto the needle.
3. Cartridge Alignment and Tracking Force: Periodically check the alignment of your turntable’s cartridge and adjust the tracking force as necessary. Proper alignment and tracking force ensure accurate tracking and optimal sound quality.
Frequently asked questions for how to clean a record needle
- How do I clean my record player needle? Cleaning your record player needle is essential to ensure that it functions optimally and produces high-quality sound. The best way to clean your record player needle is to use a soft-bristled brush or a stylus cleaning solution. Gently brush the needle from back to front, and avoid applying too much pressure. This will help remove any dust or debris that may have accumulated on the needle and improve the sound quality of your records.
2. Can I clean my record player needle with alcohol? While alcohol is a common cleaning agent, it is not recommended to clean your record player needle with it. Alcohol can damage the needle and cause it to wear out faster. Instead, use a stylus cleaning solution or a soft-bristled brush to clean your needle.
3. How often should I clean my record player needle? It is recommended to clean your record player needle after every 30-40 hours of playtime. This will help maintain the sound quality of your records and prolong the life of your needle.
4. What is a stylus, and how does it work? A stylus is a small, pointed device that sits at the end of the tonearm on your record player. It is responsible for reading the grooves on your records and producing sound. When the stylus moves along the grooves, it vibrates and generates an electrical signal that is amplified and played through your speakers.
5. How do I know if my stylus is damaged? If your stylus is damaged, you may notice a decrease in sound quality or distortion in the sound. You may also hear a hissing or crackling sound when playing your records. If you suspect that your stylus is damaged, it is recommended to have it inspected by a professional to avoid further damage to your records.
The Bottom Line
In summary, proper care of your record needle is crucial for optimal audio quality and longevity of your turntable.
Utilizing tools like the microfiber brush, carbon fiber brush, or stylus cleaner kit can significantly enhance your listening experience.
Regular cleaning, tailored to your usage frequency, ensures the preservation of sound clarity and record integrity.
Additionally, incorporating general turntable care, such as careful handling of vinyl and maintaining cartridge alignment, further elevates your audio experience.
In essence, a well-maintained needle is key to unlocking the full potential of your vinyl collection.
If you are interested in a quality record player – check this one out.
Click on the links below to see more related content
